Tuesday, January 15, 2013

Bad Project Gone Good

Awhile back I saw a great pin on Pinterest that I decided I just had to try. It was such a cool concept:

  1. draw a design on canvas
  2. go over design with hot glue; let dry
  3. paint in design with paint; let dry
  4. use hair dryer to melt hot glue; peel off hot glue
  5. once hot glue is gone there's a lovely design.
BAD NEWS: Steps 4 and 5 do not work. for one, I didn't want to wear my hairdryer out (essential for my hairstyling) and two, it took too damn long! I would have spent hours melting the glue off.

I decided this horrible project needed a turn around ASAP. using some spray paint and a clock kit I turned this disaster into some lovely art. here's the process:
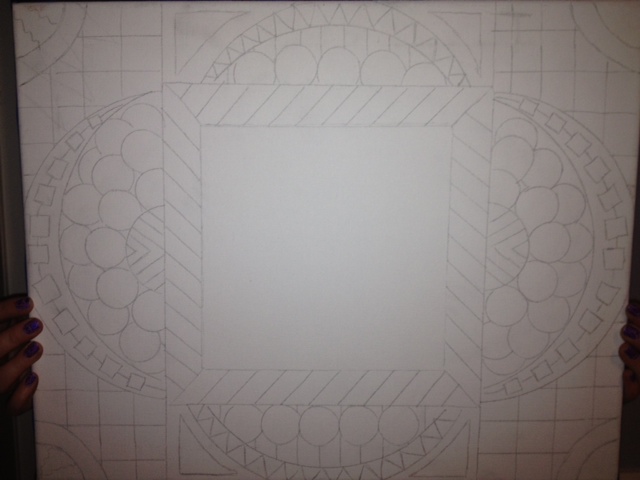


Create your design in pencil. I used a ruler, a lid and a bottle of paint to create the shapes seen on my canvas. Go over design with hot glue.


Paint your design (if you want to try the whole paint-then-remove-glue method). try not to make yours as ugly as mine.
 
*Spray paint canvas the color of your choice.*


 this is what the clock looked like when I got it from Hobby Lobby (hands not shown). I didn't care for the brass finish so I spray painted the clock and hands white.


 once the clock pieces dried I was ready to put it all together. to add the clock I put a hole through the center of the canvas so I could attach the clock. btw, the clock wasn't easy to put together.


this is the back of the canvas. the clock piece was heavy so I held it in place with tape.


add the clock to the canvas. the clock I had purchased had adhesive on the back but I still used hot glue to make sure it didn't fall off.


the finished product!


I guess I've learned my lesson: nothing you create from Pinterest turns out looking exactly like it did on the Internet. glad I was able to change the outcome of this project.

Sunday, July 22, 2012

Bottle Cap Collage


like many of my wonderful craft projects I got the idea for this collage from pinterest. the minute i committed to this project i had everyone i know start saving caps for me. i got TONS of caps, they made for a fantastic (and colorful) collage. i didn't limit myself to just soda caps,if you look closely at the pic you can see that i have just about every kind of top/cap: detergent caps, medicine bottle lids, deodorant, marker caps, chapstick caps, nail polish tops, shaving cream lids...... you name it, i glued it.


MATERIALS:
  • bottle caps/tops
  • canvas
  • spray paint
  • hot glue gun


STEPS:
arranging the caps
  1. i began by spray painting my canvas a lovely Tiffany-esque blue color. obviously you don't have to do this, i just thought the collage would look cooler w/ a colorful background.
  2. i suggest arranging the tops on the canvas before you glue them down
  3. glue down your caps as you see fit.
  4. i didn't want the canvas to be too one-dimension, so i gave it some depth by gluing one cap inside another.


Saturday, June 16, 2012

SPLATTER PAINT


Up close view of the finished product

I was perusing some blogs yesterday and came across some inspiration for my latest project on the Sketch 42 blog. The author of that blog made some kickass splatter paint shoes-- she used plain white TOMs and paint (duh!). Well, I don't have a pair of white TOMs (or other plain white shoes for that matter) lying around, SO I decided to do some splatter paint on a plain 'ole white canvas.

MATERIALS:
  • paint
  • canvas
  • masking tape
  • brushes
  • dropcloth/large area in which to make a big mess
    • I spread a dropcloth on my deck and did this outside. Most of the paint stayed on the dropcloth, however there were some paint casualities: a few plants and perhaps some outdoor furniture are now a tad bit more colorful...

The PROCESS:

Before I started painting, I decided that I would put masking tape in random lines across the canvas to make for an interesting looking piece when I was done. I could have used painter's tape but that tape was too wide for my liking...

To create the splatter effect I mixed my paints w/ a little bit of water and then flung the paint at the canvas. Although I had a variety of brushes in my arsenal,  I found that the best brush to use was a thick kid's paintbrush. For the majority of this piece I did just fling the paint at the canvas, but I did take some bottles of neon paint and just dribble/swirl them across the canvas.


Pre-Tape Removal
Wait for the paint to dry, take off your tape and VOILA! you have a beautiful splatter paint creation!


NOTE: GREAT PROJECT FOR KIDS! While I was working on this project my nephew (5 1/2 years old) was working right alongside me doing pretty much the same thing I did. Using the same tape technique (I did it for him) he used 8x10 canvases and made 2 gifts for Father's Day, one for his dad and one for his grandpa. They turned out really cute and of course they loved the paintings! We got really messy but had tons of fun doing this. we will most definitely be doing this again!


Saturday, June 2, 2012

Crayons: I'll stop the world and melt with you.

I never cease to be amazed by the awesome projects I find on pinterest. the latest thing I've been fascinated with is art w/ melted crayons. I originally got the idea when I pinned an item titled '35 Uses For Crayons'. once I hopped on to that site I found a project that really appealed to me, it involved melted crayons. apparently this is based on the concept of pointillism which is when dots of color/paint/wax (whatever) are used to create a larger image.


Materials
MATERIALS:
  • canvas-- I used 16x20
  • crayons--I used crayola crayons because I'm a bit of a crayon snob.
    • I peeled the wrappers back.
  • tea light candle
  • bottle caps- I used Snapple lids.
  • beads
I stared at the canvas for awhile before I decided I would use a kind of argyle pattern. i chose where i wanted to begin my pattern (in the corner i think) and starting getting crazy w/ the wax!

STEPS:
wax dots/ step 2
  1. choose your design/pattern; i marked the beginning of my diamond shapes in my argyle pattern by doing a light sketch of the shape with my crayon (crayon is not melted at this point). once you get going the crayons will cover your outline.
  2. To start the process w/ the crayons, dip the end of the crayon into the flame of the tea light. you don't need to hold the crayon over the flame too long because it will drip. With the melted crayon you can either do dots (see picture) or color w/ the crayon.
  3. Once I completed my pattern over the entire canvas it took me awhile to decide what/if i was going to do something else to it. I liked my argyle pattern but i felt like it need something extra, something round to even out all the angles from the diamonds.
  4. I had been collecting bottle cap/tops for awhile for some unknown future project I'm sure i will do, while looking in my bottle cap stash i found some really cool Snapple lids. i don't drink Snapple drinks but i love that the bottle caps have 'real facts' on the lids. not only are you enjoying a cool beverage, you are learning something in the process.
  5. i used hot glue to glue the caps, i ended up using orange beads (i was loving orange in this project) along the outside of the canvas.
DID YOU KNOW that every ton of recycled paper saves about 17 trees? thanks Snapple!!


Here is the finished product. Yes, I realize it looks a little weird but that's okay because I like weird and I made it. :)

Future projects: I had fun making and playing around w/ the crayons and patterns. I think it would be cool to create a mural of sorts w/ the crayons. google 'pointillism' for ideas. this would be cool to do with kids but you'd have to figure out how you would melt the crayons in a safe way with/without a candle. obviously supervision would be required but you're smart so I'm sure you figured that part out.....


Friday, June 1, 2012

Proud as a Peacock


So here I am once again w/ yet another recycled book project, this time around I've made a beautiful peacock. I created this piece to be sort of a sister to the L project I've already completed. They harmoniously reside on the same wall. :)


Just like my other book projects the main materials needed are book pages. Pages with words are what I used as my background. Using illustrations from the books I cut strips about centimeter wide to use as the border on the canvas. I also used the illustrations to create the feathers on the peacock. I'll break it down step by step in a bit.


MATERIALS:
  • Book pages (with writing and illustrations)
  • Scissors
  • Modge-podge decoupage glue (matte or glossy, your preference)
  • Brush for decoupage glue
  • Sharpie (I used a Sharpie to outline the edges of my feathers to give them more definition)
  • Solid color cardstock (for the peacock body)
  • Small rhinestones (optional)
  • Hot glue gun + glue sticks
STEPS:


1. Use modge podge to glue the book pages for the background.
2. cut centimeter strips of book illustrations for the border, used modge podge to adhere them to the canvas.
3. I cut out illustrations from books for the feathers. I used cardstock to make a pattern for the shape I wanted. Once I had all my shapes cut I used a sharpie to outline them to give them some definition against my background.
4. I created the peacock base (the blue part in the picture) using a dark blue piece of cardstock. instead of using modge podge at this step I used a little hot glue to put this on the canvas.
5. back to the modge podge--- carefully place the feathers on the body of the peacock and glue as you go.
6. Once I had all my paper pieces glued on-- the peacock body, feathers and head feathers--I did a final coating of modge podge on the whole canvas.
7. I'm a gal who loves sparkles so to add some sparkle to my piece i glued a few (maybe 5) rhinestones to the feathers.


VOILA! a lovely peacock I am proud of!

Leslie


Wednesday, April 11, 2012

Library Letters

My latest project involves using pages from children's books to create 4 panels that spell out READ for my school librarian. She's the one I got all the books from so I thought I'd make her something to show my appreciation. I'm really proud of the final product, I think they turned out beautiful!

Supplies:
  • modge podge decoupage glue (glossy or matte, doesn't matter)
  • brush (for decoupage glue)
  • cut up book pages
  • cardstock
  • hot glue gun
  • scissors/exacto-knife type blade
  • 8 x 10 canvas panels

Steps:
  1. Using the modge-podge glue randomly place the book pages on your canvas. While I try to be random about the placement, I still like to make sure that my colors are evenly spread out across the canvas. **For this project I used the book illustrations as my background instead of the words like I have used in my previous projects.
  2. Once the glue has completely dried I cut off any overhanging/excess paper from the canvas using my scissors and my exacto knife.
  3. To create the letters for the panels I drew the letters on regular cardstock paper. Once I had the size I wanted I glued the written book pages onto my cardstock base.
  4. After the glue dried, I trimmed off the excess paper from my cardstock letter. *to add an extra pop of color to your finished produced you can reglue your letter to a colorful piece of cardstock like I did w/ orange paper.
  5. I used hot glue to adhere the letters to the canvas .
  6. As a final touch for my project I put a final coat of the modge podge on top of each panel.
A close-up of one of the letters.

Harry Potter and the creature from the Black Lagoon are keeping my letters company.


VARIATIONS: I think this would be an awesome project for a kids room, spelling out their name would look so cool!!!

Wednesday, March 28, 2012

Musical Chair(s)

Last summer my brother salvaged an old-school desk from a garage sale (could have been from the curb, I don't remember). He wanted to use it in his classroom but didn't exactly know how he could improve the appearance of the old, beat-up desk. Being my crafty schmafty self, Chris sought my advice. My answer: DECOUPAGE!!! Chris is an elementary school music teacher so he wanted to somehow incorporate music into the project, we decided to use sheet music and cd covers/jackets to accomplish the task. We found some really classic cd covers too! LFO, Backstreet Boys, Boyz II Men, Michael Jackson and Eric Clapton helped beautify the old desk. Oh, don't let me forget that we used stuff from his band The Rebounds. Prior to the decoupaging Chris cleaned the desk and took off the parts we decoupaged: the seat, seat-back and the top of the desk. He ended up spray-painting the metal part of the desk a bright, cheery red.

What you need:
  • desk
  • decoupage glue
  • paintbrush for glue
  • sheet music
  • cd covers
VARIATIONS:
I think this would make an adorable project for a kid's room. You could use that child's artwork, photos or cute scrapbook paper to decorate the desk.
Back of the seat


The seat


 The top of the desk (duh!). I added Scrabble letters to give the desk a little extra pizazz!

The finished product!!


Happy Crafting!

-Les